18th C Mauve Silk Gown Sew Along
This project was long, and there were lots of parts to it. There will be more blog posts dedicated to the undergarments, shoes, and hair and makeup if you're interested! Ok, here we go. Ready? Set..... GO!
THE BEGINNING:
So I bought this fabric ages ago. The local JoAnn’s was closing, and everything was on crazy super sale. If I’d had more spare change at the time I would have bought out the entire place, but I settled for this gorgeous mauve-y silk dupioni. It was originally about $35 a yard, but I got it for $9 - probably to this day one of the best fabric purchases I’ve ever made.

Laying out the en fourreau pleats
When I first purchased it, I didn’t know exactly what I was going to make, but I’d gotten about 6 or 7 yards of it, so I knew I could go big. The mauve just felt so rich to me, that I knew it was going to be something period, and something probably from the noble class. It sat behind my desk for a while before any real inspiration struck, but in doing research for a completely different project I stumbled on an en fourreau pleating tutorial. I knew that’s what I wanted to do with this fabric – a monochromatic 18th century robe a l’anglaise with en forreau pleats. En fourreau pleating is an evolution of the sack back dress. It maintains the beautiful pleated lines at the back, but tucks in at the waist. It also leaves a smooth princess panel on the back of the bodice while incorporating knife pleating at the skirt, all while retaining the long line of the center back pleating. I was absolutely enchanted by the way the backs of these dresses look, and couldn’t get enough. I sifted through all my books, pinterest, and blogs for the exact right feel until I came up with a fairly simple design, based, among other things, on this extant striped robe:

Check out the rest of it here
If you'd like to see the pin board of inspiration, it's full of all sorts of fun pieces.Check it out here. This is from my personal account, but feel free to follow me there at kristao22 if you want to check out pastel goths, NSFW sexy things, mermaids, home goods, and recipes. If you prefer costumery and historical clothing, stick to kristaOdesigns.
A few key differences between my gown and the Met gown, which was my primary inspiration: My underskirt/petticoat ended up being MUCH shorter than intended, due to me not being able to count and running out of fabric. Thus my Robe a l’Anglaise became a makeshift Robe a la Polonaise with a few helpful ribbon ties. I also did a smooth, pointed bodice instead of the tabbed front, simply because I preferred the look of it and there were definitely images to corroborate my prejudice. I also ditched the cuffs on the sleeves. I wanted to be able to wear this with a lace sleeved chemise at some point, and while this *is* the 18th century, you still have to balance out how many details you have all together in one place. I kept the charming pleats in the bodice, and decided to make them connect at the bustline to close with a brooch. Someday in the future I will order more of this silk from JoAnn’s and fix the petticoat, but until then I will either tie up the skirts or wear a different colored petticoat underneath – there’s plenty of examples of different colors being worn under the robes. White was not uncommon, so I may make myself a lightweight, sheer muslin or linen skirt with some ruffled trim in the meantime.
CONSTRUCTION:
My first steps were to drape the bodice, which was basically the only thing that would be draped. The skirts, petticoat and sleeves were all drafted by hand. I used my size 2 mannequin, since it’s got the smallest waist to fit my pink rococo style stays on it (which are available here, and if you’re curious for more info, check out my blog entry on them here). Naturally, I neglected to get any photos of the draping or drafting.

I did, however, get photos of the pattern laid out

Once the pattern was complete, I cut the arms and front bodice pieces out of the silk and all the pieces out of the lining fabrics. I used both a poly blend jacket lining and a cotton that I flatlined to the shell for stability, to create the inner layer of the robe. The silk is very lightweight, and this is a very structured style, so I wanted to give it something to hold itself up with. I did not cut the back from the silk because I planned on being SUPER SNEAKY and using this technique to complete my en fourreau pleats. If you didn’t click on the link (I’m looking at you. Yes you. You should cause the lady who thought of this is a genius and deserves your click.) the magical trick is to PLEAT AND PRESS AND STITCH BEFORE CUTTING.

Yes, it’s that simple. If you’ve ever encountered an en fourreau sewing pattern, you know that it isn’t exactly simple. Cutting the pleats out and making them fit, especially when fitting the pattern to myself, didn’t sound appealing. This solution saved my butt.

The carefully pressed and pinned pleats

Top stitching in various lights and angles. I just really like how pretty this is, guys.


Pattern cut out ON TOP of the pleats

So I measured the back pattern piece, pressed my big ol’ pleats into the silk, carefully pinned them into place and stitched them down. I now wish I had done the stitching slightly differently, but I’ll just have to be ok with the topstitched look, since this silk is super unforgiving when it comes to picking out seams.
Once I had the pieces all cut out, I did some detail work on the front, mainly creating the cute little pleats that would connect at the bust. These were actually completely separate pieces that I added on top of the base, not just strips of fabric sewn on for illusion. I mostly did it that way because the Met dress looked like that was how it was constructed, but also it allows me to wear a stomacher with this dress should I chose to in the future. The base dress closes at the center front with period accurate pins – a historical detail that I will absolutely be nixing once I have time. It did create a beautifully smooth front line, but it was WAY too much of a pain and I kept having to readjust the pins all night. I could pin a stomacher on over a spiral laced front, or even create a hidden button panel if I’m feeling extra fancy. Both options have extant historical references, so we’ll see which one I go with.

The flatlined base of the front bodice

Close up of the bodice flap. ugh... flap is such an ugly word. Panel. Bodice panel.

See? Separate and open!
Once the back was complete, I stitched the detail bodice pieces to the front base, and then the front bodice to the back – I did not attach the shoulder straps yet for reasons we will get to later. I now have most of a bodice to attach my skirt to.


Now it’s pleating time! I added the side skirt panels to the combination bodice-and-back-skirt, pressed the seam flat, and knife pleated each side into about the half way point of the bodice front. I pressed the pleats and stitched them to the bodice. This does leave a VERY slight tuck underneath the en fourreau pleating, since there needs to be a quarter inch for both the bodice and the skirt to be sewn to each other. Fortunately, that is hidden under the big pleats.


Pinned pleats
Once the skirt is attached, I stitch the lining to the shell, carefully stitching the back of the lining to the flatlined cotton, avoiding going through to the silk shell. This creates a nice smooth line all the way around the waistline, center front, and bust line. We leave the shoulder straps off, because we’re going to insert the sleeves in the historical manner! Because an en fourreau back wasn’t challenging enough…

lining attached with the shoulder straps disconnected
So I only got a couple of terrible photos of the sleeve process, because 1. It’s harder than it looks and 2. I got real mad and forgot about my camera, but essentially you attach the lining shoulder strap, pin the sleeve into the under arm, then gather or pleat the top of the sleeve into the arm hole so that it fits exactly to the wearer, and then stitch the shell fabric on top to hide everything. Now, since I didn’t have anyone to fit the sleeves for me, I did them on my mannequin. I used the incomparable American duchess as a guide, she has step by step instructions here.


Once the sleeves were in, I was SO RELIEVED and also almost done! Theoretically, at this stage it could be worn with the right undergarments. BUT OF COURSE, I did not have the right undergarments. What I had was a crescent shaped bum roll, my stays, and some decidedly mud stained cotton petticoats. These do not a proper costume make. So I whipped up a pair of panniers, for which there will be another blog post soon.


Poor quality photos of the panniers. Skinny, wide. Skinny, wide...
The original plan with the ensemble was to create a monochrome gown. I wanted to do something similar to the Met petticoat with the pinked ruffle along the front, but when I went to lay out the fabric, I could hear it laughing at me. There was NO WAY I’d be able to get a full length petticoat out of what was left, let alone a super intense ruffle along the front of it. I cut what I had left into two sections, pleated them and stitched them together, leaving about 10” at the top. I finished the side seams off, and pleated the waistband into two ribbons. This technique allows easy access to the panniers that would eventually hold the skirts up. And naturally did not get photos of this step, but I DID get photos of the awesome jaguar buttons i found in my drawer!

Gold Lion Buttons! and REALLY bad, not at all color matched stitching!

Inside button! More bad stitching!
Now I had what was the 18th century equivalent to a micro mini skirt. So, in true theatrical form, I improvised the rest of the ensemble into something much shorter, and somewhat scandalous – an ankle baring robe a la polonaise! I found some big gold buttons, and some tiny black ones, and stitched them together as anchor points on either side of the gown. To these buttons I looped on some black satin ribbon, and simply scooped up the bulk of the skirts in the back. The robe was still significantly longer than the petticoat, but it at least made sense together now. Bonus- I got to wear some very anachronistic but super pretty white fishnets to the ball. All the better to show off my shoes and ankles with, right?

gratuitous shoe shot. these started as work pumps, kids. and yes, my laundry was out of control that week.
And that finished off the gown! I hemmed both skirts with a 1” machine blind hem stitch because there was no way on god’s green earth I was going to hand sew that much yardage with a pick stitch in a straight line. Not even for chocolate. Well, maybe for chocolate. What kind are you offering?


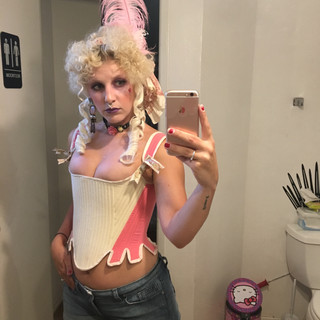
I tried a few different styling options, including a silk tie at the waist and a lace wrap at the shoulders. I wasn’t super thrilled with the cream lace, so swapped it out for a much more pirate-y black, and that made me happy. The hair and makeup is a whole other blog post that I will probably get to eventually, but when it was done I felt like an old school gypsy tattoo in the best possible way. Or possibly a rococo prostitute – also in the best possible way.